If you’ve recently upgraded to Builder Hall 6 base in Clash of Clans, you’ve probably noticed one thing immediately: attacks become far more strategic. At this level, players unlock stronger defenses, more advanced troop combinations, and the infamous two-stage battle system that can completely change how you design your village. A poorly planned setup gets crushed in minutes, while a smart Builder Hall 6 layout can frustrate even experienced attackers.
The good news? You don’t need a professional esports-level design to protect your trophies. With the right approach, your Builder Hall 6 base can become incredibly difficult to break. In this guide, we’ll explore effective layouts, defensive strategies, troop pathing tricks, and practical tips that work in real battles—not just in theory.
Why a Strong Builder Hall 6 Base Matters
Builder Hall 6 is a major turning point in the Builder Base progression. Players gain access to powerful defenses like the Giant Cannon upgrade and improved traps, while offensive armies become more destructive with stronger Beta Minions, Cannon Carts, and Night Witches.
What makes BH6 unique is the two-stage battle structure:
- Stage One: Defend your Builder Hall and core structures.
- Stage Two: Survive cleanup attacks and protect percentage points.
Unlike lower levels where players spam troops for quick wins, BH6 battles reward tactical layouts that force attackers into mistakes.
A well-designed Builder Hall 6 base can:
- Reduce three-star attacks
- Protect your loot during matchmaking
- Push trophies faster
- Counter common troop metas
- Force attackers into time failures
Many high-trophy players report that a smart defensive setup can improve win rates by 20–30%, especially when paired with upgraded traps and walls.
Best Builder Hall 6 Base Layout Principles
Before copying any layout online, it’s important to understand why certain designs work. Strong bases aren’t random—they manipulate troop AI and create defensive pressure.
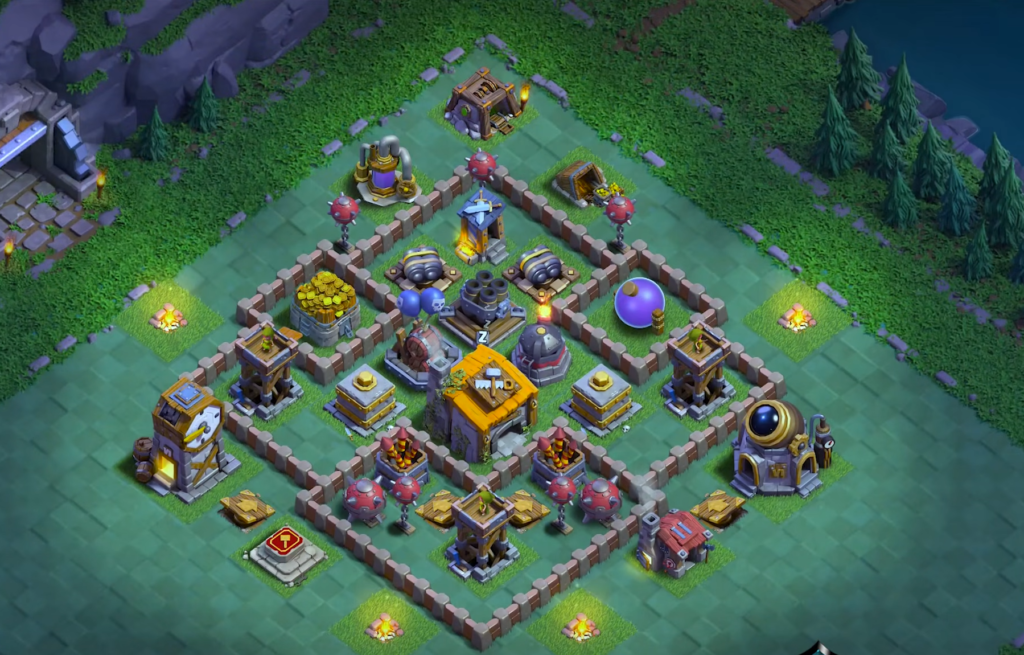
Centralized Builder Hall Placement
At BH6, keeping the Builder Hall in the center is almost always the safest choice. Surround it with:
- Crushers
- Double Cannons
- Roaster
- Air Bombs
- Hidden Tesla
This forces attackers to commit most of their army just to reach the core.
Spread Out Defenses
Compact bases may look secure, but they’re vulnerable to splash damage. A wider Builder Hall 6 base creates awkward troop movement and separates tanks from support troops.
For example:
- Giants may wander away from Cannon Carts
- Beta Minions can get picked off by Air Bombs
- Night Witches may lose bats early
Spacing matters more than many players realize.
Final Thoughts on Building the Perfect Builder Hall 6 Base
Creating a powerful Builder Hall 6 base isn’t just about copying a fancy layout from the internet. The strongest players understand troop behavior, defensive spacing, and the importance of adapting to current attack strategies. That’s what separates average bases from truly frustrating defenses.
As you continue upgrading your Builder Base, focus on balance. Strong traps, smart wall placement, and layered defenses will consistently outperform flashy but impractical designs. Most importantly, keep testing and improving. Even minor adjustments can dramatically improve your defense results over time.
With the right strategy, your Builder Hall 6 base can become a nightmare for attackers—and a major advantage in climbing trophies faster.
Recommended for You