Reaching Builder Hall 10 base in Clash of Clans feels like entering a completely different level of competition. Players attack faster, troop combinations become more advanced, and weak layouts get punished almost instantly. At this stage, simply upgrading defenses isn’t enough anymore. Your base design has to work intelligently across both stages of the Builder Base battle system.
A properly designed Builder Hall 10 base can slow down powerful armies, protect trophies, and make even experienced attackers struggle for stars. Since Builder Base battles are split into two stages, the most successful layouts focus on weakening opponents early and finishing them off later.
Whether you’re pushing trophies, farming resources, or trying to improve your defensive win rate, understanding how to structure both stages is the key to long-term success.
Stage 1 in a Builder Hall 10 Base
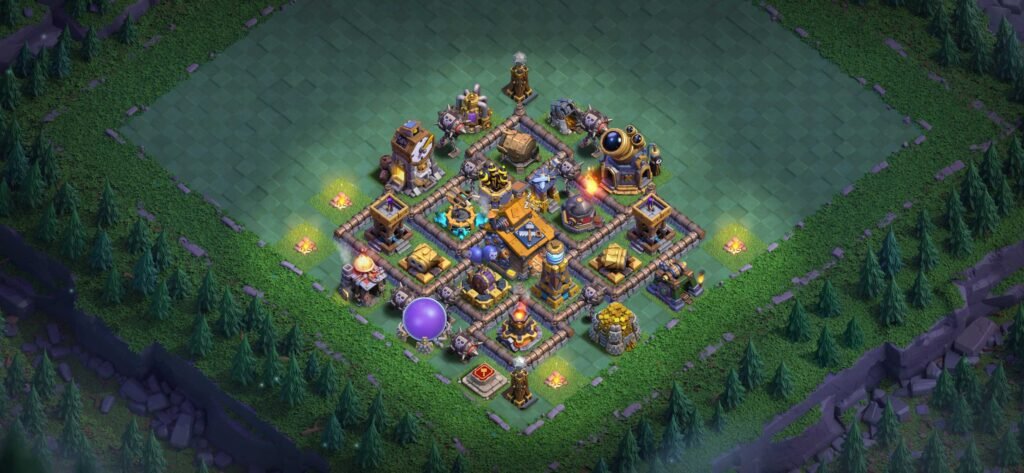
The first stage acts as the opening defense line. Its job is not always to stop attackers completely. In many cases, the goal is to weaken the enemy army before they move into stage 2.
A good stage 1 creates pressure immediately and forces attackers into uncomfortable troop placements.
Main Goals of Stage 1
An effective Builder Hall 10 base stage 1 should:
- Drain Battle Machine health
- Trigger troop abilities early
- Break attack momentum
- Force troops into traps
- Reduce the number of surviving units
Even if attackers clear the first stage, they should enter stage 2 with fewer troops and reduced offensive power.
Best Defensive Setup for Stage 1
Certain defenses perform especially well in the opening stage.
Crusher Placement
Crushers are extremely effective against melee-heavy armies like Boxer Giants. Placing Crushers near funnel points forces attackers to take heavy damage before reaching core defenses.
Roaster Coverage
Air attacks remain popular at Builder Hall 10, especially with Beta Minions and Baby Dragons. The Roaster helps shut down these strategies quickly when positioned centrally.
Archer Towers and Double Cannons
These defenses provide consistent damage while covering both ground and air approaches. Spread them out to avoid giving attackers easy value.
Wall Design for Stage 1
Walls are more important than many players realize.
Instead of building one large compartment:
- Use smaller defensive sections
- Create misleading openings
- Force troops to split apart
This makes troop pathing unpredictable and slows down attacks significantly.
A strong wall setup can turn even powerful armies into disorganized groups that defenses eliminate one by one.
Trap Placement in Stage 1
Traps are often what separate average layouts from strong Builder Hall 10 base designs.
Effective trap ideas include:
- Spring traps near wall gaps
- Push traps directing troops toward Crushers
- Hidden mines protecting vulnerable defenses
- Air bombs covering anti-air blind spots
The goal is to surprise attackers rather than relying on obvious placements.
Stage 2 in a Builder Hall 10 Base
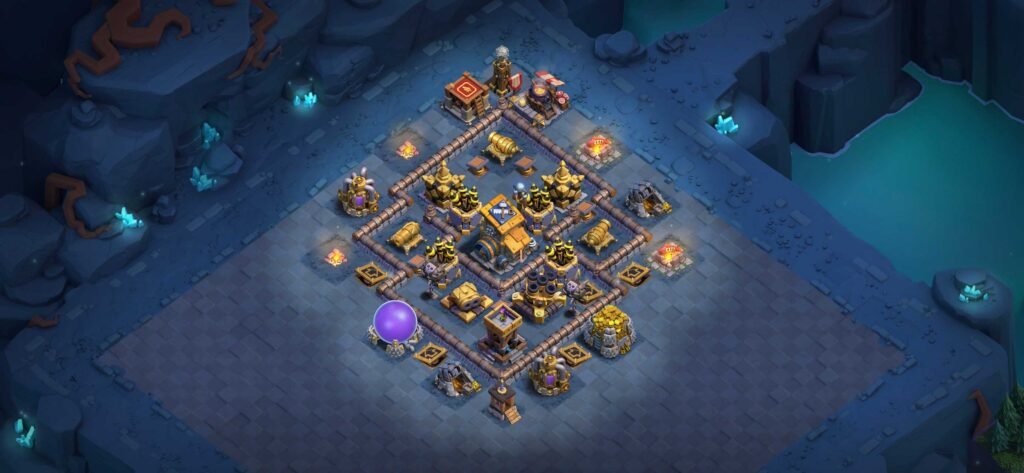
Stage 2 is where your defense should become far more dangerous. By this point, attackers usually have fewer troops remaining and less flexibility in their attack strategy.
This stage acts as the finishing layer of the Builder Hall 10 base.
A powerful stage 2 can stop attackers from securing full stars even if they cleared stage 1 comfortably.
Main Goals of Stage 2
The second stage should:
- Punish weakened armies
- Prevent complete destruction
- Defend high-value structures
- Slow down cleanup troops
At higher trophy levels, stage 2 often decides whether an attacker gets four stars or a full six-star victory.
Best Defenses for Stage 2
Some defenses become especially valuable during the second stage because surviving troops are usually grouped together.
Mega Tesla
The Mega Tesla remains one of the strongest defenses in Builder Base.
It works best when:
- Protected inside multiple wall layers
- Supported by traps
- Surrounded by splash defenses
Its burst damage can quickly eliminate key troops late in battles.
Lava Launcher
The Lava Launcher is excellent for stage 2 because attackers often have clustered troops remaining by this point. Its splash damage continuously pressures weakened armies.
Giant Cannon
The Giant Cannon performs extremely well against tank-heavy attacks and damaged Battle Machines trying to survive into the second stage.
Conclusion
Building a strong Builder Hall 10 base is about much more than placing defenses randomly. Every compartment, trap, and defensive structure should serve a purpose across both stages of the battle.
Stage 1 should weaken and disrupt attackers, while stage 2 should finish off whatever troops remain. When both stages work together properly, your base becomes far harder to defeat.
The best Builder Hall 10 base designs are flexible, unpredictable, and constantly evolving. As attack strategies change, smart players continue adjusting their layouts to stay competitive.
If you take the time to improve both stages carefully, you’ll notice stronger defenses, better trophy protection, and far more frustrating battles for your opponents.